Monday, August 25, 2008

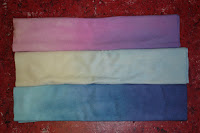
The Proof Of the Wreck

I thought I would post you the results of the huge amount of shrinkage I achieved by throwing a texture in where it didn't belong. With lotsa soap , with lotsa agitation you can really shrink your wool.
This is the same amount of wool, 1/8th yd.

It did darken the colours though.
BTW Did you know you can double click on any picture in my blog and have a closer look at it ?


Saturday, August 23, 2008

Wreck of the Lightweight wool

Well, at least once when I'm washing textures I'll mess one up and I threw a very lightweight texture into the thin pile and wow have I got a short- thick bit of business.
Thankfully it's resemblance to a pineapple and my embellishment machine I might be able to create something interesting
The real trick is to remember to treat it gingerly the next time I wash some.

With the weather being so hot I've been unable to dye , though I thought I might take a page from many of my friends and dye outside, I found even being on the deck unbearable.

Hopefully tomorrow will bring cooler breezes.

Here's a winter hooking of from Cedar Point with ice on the bay. This rug was hooked in straight lines like a strip piece quilt.

Thursday, August 21, 2008

The Wool And The Washing

Having returned from The Dorr Mill store recently and having just paid my bill I was motivated to get some of the wool I bought washed and dried and on the shelves for sale. It was a mostly texture buying trip.

Now as many of you already know, you do not EVER need to wash off the bolt wool you will be dyeing.
But I am not going to be dyeing this bunch of wool so I need to get rid of the "finishing " and get it nice and fluffy and soft.
We all love the "good hand" of wool. And it's up to me to make the magic happen.

These textures come in a variety of weights.
I do try to get wool that I guess will be good, it can be a a real crap shoot. And sometimes I am seduced by certain colours and combinations and get some iffy bits.

So I found I had wool that felt thin, perfect and a bit thick.

I do avoid wool that will not flop or drape , if it is too thick it is only good for penny rug bases or maybe my embellisher or if I were to suddenly open a coat factory. So I steer away from that.

I also don't want to feel rough, shiny or bristly wool.

I don't mind an odd non wool thread as it adds quite a bit of merriment when you wash or even felt it up.

So in order to make sure I didn't over process some wool or under process others I divied to wool into three piles.
Thin
Thickish
Perfect
(These are relative judgments of this wool in comparison with one another)

I have the thick ones in the washer with cold water, little soap on Gentle.

The thins will be washed with more soap, warm water and regular agitation.

The in betweens I'll wash with cold water, little soap and regular agitation.

I hope to achieve success and not over or under process these wools.
See Medium and Thin piles below.
At least I'm generating steam or heat and still getting something done.

Updates on the Geometrics- Today's Hook-in

It was a strangely hot day today but we still met and hooked together. Well... me not hooking at all but everyone else was as well as doing some finishing. Dayle says she is on the Fall Fair Count down getting things ready to enter. She is making a wonderful horse's as in a field with a barn and it is a wonder! Will post it when all the finishing touches are done.

Barb came with an ingenious way to keep her nylons in order ! Her project is really looking beautiful too, beauty and brains, some girls have all the luck.


Pure Genius - we have temporarily called it The Imitation Arm.

Jane, who is a brand new hooker brought her completed geometric to learn to finishing techniques.
She did a terrific job! She cut a nylon in a spiral on a bread crumb can to get a good long strip to whip with.
I leave the decisions about where to place colour to the student.
She is a natural ( born hooker ).
We are really proud of her accomplishments.


Also Sue is pretty much done her piece, she recently used it to demostrate and was pleased at people's response.
She tied some of the legs of the hose to show easily what she was hooking with. She is so terrific at demonstrating , she has a wonderful way with people.


Erin 's geometric is really looking lovely, this is only her second project but really I think it classifies as her first, she began with a kit. She is doing an amazing job ! Great Colour Combos.

Tuesday, August 19, 2008

The New Toy

While away I decided to get something new to play with- The Embellisher
Sounds like a featherweight boxing champion !!!

This machine looks like a conventional sewing machine but joins fabric together with out thread.
The only material it won;'t work well with is gold lame.
I'm sorry Cher I can't work for you anymore.

It uses felting needles to do this.
I'm having a blast with it.


The first thing I did was the aborted flower on pink.
I had a bit of trouble as I rip straightened the material after I was done the felting and ripped the flower in half.
You live, you learn.

The next thing I made was the lovely trim on the bottom, silk saris yarn, silk thread, cut strip from hooking and some phentex and separated wool yarn. Like that !

Next pictured, one part of my out of the box project... Scene from the Black Lagoon.
This machine is a total pleasure !!
Using up tons of bits of business that were destined for the someday pile which eventually become the dump pile.
Hope I can make something really cool soon, still building up my chops.

Trip And Sights

In case you didn't notice , I'm a terrible diarist. I hope you'll forgive me. I might even make up words when left to my own devices.

Today is a day of making up things that don't exist - to create later -to bring them out of the dark recesses of my mind to you. To explain I spent a few minutes writing up the next 10 article proposals for RHM. Once I get on the roll of thinking what to cover it doesn't take long.
It took me longer to think of alliteration names for orange,---- peach , persimmon, pumpkin, I wanted a fourth but was foiled. Any ideas ?

It's not even September and I feel a great need to get organized, in the most difficult place to achieve this.... my mind !

The first thing I want to do is relate a couple of things I saw on my summer vacation.
One was Van Gogh's Starry Night.

It is small.
It is much more richly coloured than we have been lead to believe in print.
It is covered with glass
It's frame does not meet the edges of the paint.

Hmmm, It is amazing how much we can forgive the work of the famous and scruntinize the work of the hooker to the right or left for some grevious error..... I'm pointing directly at myself here.
Why I hazard to guess if Vincent took his Starry Night to get certified as a rug hooking teacher they just might fail him....

I also saw the Cypresses. Very thick with paint and shiny. Not behind glass. This picture uses the dark foreground and light background to great effect. The heavy weighted block of the Cypress is not matching the lightness of the airy sky depicted.
Once again not a good rug in the expected sense but instead it is MAGIC. Intriguing. Thought provoking.

I saw many paintings that day at the Yale University Art Gallery.
Ones of Note:
Vincent's Cafe at Night.... the colours are electric.
Early Monet- looks unfinished ( and perhaps really is )
Late Monet - looks over worked ( how can you tell when enough is enough ?)
Dali- tiny , tiny work painstaking work

I also went to the British Museum across the street.
Filled with portraits.
Yup -- filled
You know I like them. I noticed how flawlessly fabric is depicted, like you can touch the silk or astonishingly LACE, but then there is a hand lying on it with as much life as side of bacon.
Good to know others fall into the same trap as rug hookers.
EYES that look wet !!!
Dead backgrounds
Very Serious countenances, not too many emotions, joy , dismay , anger or devotion showing.
Especially amused by the portraits of married couples. Who is pinching whom ?
Liked looking at the glasses ....the clothes, the poses , weakly portrayed pets.

I loved seeing all this stuff.
Will endeavour for more depth in backgrounds, more drama in the face, more realism every where. More evocotive eyes.
And more colour always.

Please note a beautiful landscape viewed from The Taconic HWY in NY with the all present in my mind heavy foreground and delicate background.

Tuesday, August 5, 2008

PIctures of Student Geometrics


At long last here are some of the pictures of the Geometric class I promised you.

Thursday, July 10, 2008

Today's Geometric Class

Today was the day we tried our hand at a ruler free geometric pillow/ runner/ rug .
This project was featured in A Needle Pulling Thread two summers ago.

There were some grunts of disbelief and tales of husbands shaking heads but it was delightful to see the dawn of the "AHA " moment.I have one sweet lady who has been coming to me each week during the summer months since I was a baby teacher, she didn't think she could do it but she drew it up so quick and slick.

One tool we found to be particularly useful was a soft artist pencil. We use an 8B, this pencil makes a great dark line. So often the pencils we draw lines with are so hard they barely leave an a trail behind them. It was important we could see our lines until we decided what we wanted to emphasize. You need to look for these in an art supply place online or in person.

We were using nylons and it is often surprising to see how the different weights affect the width of the strip, you might cut 1 inch of one weight and one inch of another and have a number three and a number five or six equivalent strip depending on the stretch of the knit.

If I had been a more thoughtful person I would have taken pictures for you to see, I apologize, but I will post progress photos they come in during the following months. Sometimes there is just not enough of me to go around. The variants on the theme are lovely and astounding, each one truly individual.

That brings me to a question Jo asked me about posting more pictures of me doing dyeing and doing demos.
My main problem with that Jo is I'm by myself most of the time while I'm doing these things so it makes it difficult to document it in pictures but I hear you and will try to get an attendant to follow my moves.

Due to a busy traveling year I have neglected my own creative work and am getting onto my two remaining duties tomorrow so I am free for the following 6 weeks for my own projects. I keenly miss making stuff and following through with my ideas and personal challenges.
I hope you can find some time during the busy summer months for yourself.

Tuesday, July 8, 2008

Further Explorations in Steamed Rolls


I thought I would post the picture of the results of my further adventures with the rice cooker and my steamrollers....

Did anyone else try this ?
I laid them in their birth order.
As I ran out of one colour and replaced it with another it is easy to see the new influence.
I love seeing that so plainly.
Is there anything more exciting than colour?

Saturday, July 5, 2008

Saran Wrap Rolls

Here is a set of step by step instructions with pictures on how to make the aforementioned rolls.
I used Majic Carpet Dyes:
Bottle Green , Moss Green, Chocolate Brown

Begin by laying out the saran ( cling film or plastic wrap) and place wet wool on it. Paint with a brush, I just buy cheap paint brushes and cut half the hair off.
Stipple and stroke the dye on and into the wool.


When the wool is all painted it should look something like this !


Next roll it up using the saran.


You can pop it into a glass measuring cup and micro wave or you can steam it in the basket of your re purposed rice/wool cooker.


The top wool was microwaved, the bottom one processed in the steam basket.

Rice Cooker

It's the time of year when yard sales abound.

This morning I was lucky and found a rice cooker, and two crock pots.
The rice cooker makes a great place to dye wool and I've got a batch of nylons in it right now. It has a steamer rack for vegetables and I think it might be a good place to steam my saran rolls
To make a saran wrap roll:
Lay down microwaveable saran type wrap.
Lay wet wool on it.
Paint dye with acid on it.
Roll plastic Wrap up, shove it in a glass measuring cup
Microwave until water clears.

What will happen to the colours if they are steamed ?

Looking to the future, I can hardly wait to try what might be done with the panini grills everyone is getting right now, guess I can dream as I wait for those to start showing up at the sales.

Thursday, July 3, 2008

Manistee Inspirations

Sometimes during class we have very good points that come up. I record them and pass them out on wind up day to help us remember what we learned.


THE MANISTEE TEN
FOR RUGS OF DISTINCTION

KNOW YOURSELF and WHAT YOU WANT AND LIKE THEN DO IT

USE A FULL RANGE OF VALUES

CREATE GLOW

CREATE IRIDESCENT EVENTS

LET THE RUG TELL A STORY- Something HAPPENED _ HAPPENING _ ABOUT TO HAPPEN

LET YOUR RUG BE MEANINGFUL TO YOU

GO BEYOND EXPECTED OUTCOMES

HAVE NEW EXPERIENCES

DON’T LOOK TO RUG HOOKERS TO SEE HOW OR WHAT TO HOOK

TRY ANYTHING YOU MAY THINK OF, IF YOU CAN THINK IT, IT CAN BE DONE

YOU CAN DO ANYTHING YOU WISH TO, JUST MAKE A START

This message has been sponsored by WandaWorks.ca from Manistee June 2008

One morning as a surprise my students modeled ( in a chorus line, no less ) panty hose we dyed the day before.
This action pretty well embodied the Manistee 10 if you ask me.

Wednesday, July 2, 2008

Creating Faces


In Manistee many people were focussing on a face. Human, Frog , Alpaca, no matter.
In one exercise we established that a face has a recognizable form, it doesn't matter how we construct it nor what it's made of.
Also a colour adventurer, Marlene, made a great composed pear !

Marbelizing in the Crockpot


Just back from the Wonderful Manistee Rug School in Michigan last week. This group really goes all out in the hospitality dept.
And there are very enthusiastic hookers as well, this is one of the few camps I go to and I do because they are so wonderful.

As usual I am bringing home bits of wet wool from dyeing demos.
I had dyed a marbelized piece but I had to use hand soap from the washroom.
I was a little forgetful and so were the results.

SO ... when I got home I decided to try dyeing a piece of the Pendleton wool I bought there that had an unusual texture.. a light gray one.

When I demo marbelizing I call it a sandwich with the meat always being chicken and the bread always pumpernickel.
I didn't get too much action from the bread pieces due to lack of proper soap.

The pendleton was the meat.
I reused the "bread" from the other demo.
When I rolled up the twist I placed in the crockpot in a snail like curl.
As usual the results of this crock pot marbelizing are DRAMATIC.

I think it's beacuse the heat is coming from all over and it just heats the colours into one another there is less water also, perhaps that helps.
Who knows ? But the result ..... it's terrific.

Friday, June 20, 2008

A Class In July

Looking for a simple and temperature friendly rug project this summer ?
Come out to WandaWorks and find out how to make a simple but gorgeous geometric pattern.
You can create a pillow top or a table runner or a bath mat.
We will be using nylons but you are free to use the material of your choice.

This class will be held July 10th from 11:30 to 4.
The cost is $30 plus materials needed.
Bring your lunch, backing of your choice, linen is available here, There will be
delicious snacks and drinks will be provided during the day.
Here is a sample of what your project may look like :


If you are interested in having a great fun filled days with plenty of laughs let me know asap, space is limited. wlm@bmts.com
Spread the word.

NOTE, I will be in Michigan until June 30th but will accept students on a first send, first serve basis as soon as I read my email.
I'm looking forward to seeing you this summer.

Wednesday, June 11, 2008

Put a lid on it! - Adaptations

It's dying day. At this time of year, that can only mean that the weather is cool. Unfortunately, it's a day to do wanderings, and I am down to just two burners--one of them being a small. With two bolts to dye and deadlines looming I have to use some ingenuity for a change.


My big stewpots have lids which I seldom use (usually because I want to re-hydrate my wood heated house--but in June, of course, that isn't really a consideration!) So I hauled out my dusty lids and shortened my wandering dye time by half using them on the pots! An added bonus was the lack of water running down the walls since it is already raining outside!

I am thrilled with this discovery! Though I love the effect of wandered wool, the wait times tend to make me nuts! (And that's not a far trip to go!)

This way, the smaller amount of steam sent up by the frying pan isn't as oppressive.

How'd you do that ?

This question came to me via the welcome mat and I thought that you guys might be interested in reading it. I always appreciate questions and welcome them any time.

Wanda said on her blog:
For a brief period when I started to dye I kept recipes and used recipes or formulas if you'd rather, when I dyed.....I no longer do this with the exception of my articles in RHM, where I am meticulous.

Jo's Question:
Wanda, how are you able to supply buyers with your great wools, if you don't dye by recipes for replication? What am I missing here? Really Really Curious!

My answer:
Well, when I'm selling wool and need to replicate, I depend on three things. First, MY EYES, combined with the knowledge of my dyes and what they do. Second, BLENDING: combining many variations on the same value to be used as one colour. And third, I depend on customers BUYING enough the first time ! (My daily prayer.)

That was a great question!

Friday, May 30, 2008

What About The Recipe

For a brief period when I started to dye I kept recipes and used recipes or formulas if you'd rather, when I dyed.
For two reasons I no longer do this with the exception of my articles in RHM where I am meticulous ( I grew new brain cells for that )

#1 I'm not an accurate person and it was too painstaking to record what I did as I got involved in the act of creating
#2 I don't like doing anything twice.

There is a wonderful freeing sensation letting your mind flow to what might be done as you dye. Following your instincts can be very rewarding.

I noted as I held an audience directed dye class I consistently wanted to take the dyeing one step further by adding yet another colour than almost every else there. I would rip the fabric in half and dye one and save the other as a before for comparison.I had a feeling I could enrich the whole thing by one simple addition.

This was because I was willing to take the risk. Next time you dye try just doing one uncomfortable thing, see what happens.

I also only take a set of 14 dyes with me when I travel.
I love the constriction of the limited palette to draw from and what I can invent with them I might not have thought of before.

I hope you will try something you haven't though to do before, there are no guarentees in dyeing as you might have noticed using formula books and samples and my articles. Just loosen up and let it go.
Know what your dyes look like in your home by dyeing samples of each then just bust it loose.

Just once.
For me and for you

Wednesday, May 28, 2008

Hungry for Colour

This evening I was doing a "down on my knees" hunt for a book I wanted to reference for someone special today but I couldn't get my greasy little hands on it right at the time.

So as I readied the room for my hookers tomorrow I decided to really look.
In my library I categorize things according to topic.
The book I hunted for is called The Colour Of Nature. But I have one called the Colour In Nature too.
The first one is merely photographic. The second actually tells you scientifically how colours and colour effects happen.

I found the IN one but not the OF one.

So as I looked closely at each book in the colour section I realized it was somehat like looking down memory lane.
I chanced upon a magazine put out by Amnerican Artists and it was a compilation of articles written about each colour.
It was from years ago but I remember announcing it on Padula and how we all scrambled to find it. What struck me was the HUNGER for colour knowledge. And yes I found it ! Now they live side by side.

WE WANT TO KNOW:
how to use it more effectively, how to be more expressive with it, how to have it do the work for use we struggle to do with outlines and he like.

Somehow we are always searching for a better understanding of it.

Reading books is great.
But like joining a gym you won't get any benefits from the buying until you do some work.
Playing with your scraps is a good way to improve your colour power.

Sort them into light , medium , dark..... can you further subdivide each of those piles ?
Sort them into piles of bright and dull,
Sort them into cool and warm piles.... notice any relativity action? How as you remove the darks, medium step in to be the next best dark ?
Or the coolness of any certain colour will change as you remove the warms from the pile?
Or when you remove the dulls, some brights will become more dull appearing so because it is all relative ?

If you want a full rich experience with a big range of colours go to paint stores and GET LOADS OF CHIPS.
I prefer the bigger square ones.
Be sure to pick colours you LOVE , ONES YOU HATE, ONES THAT MIGHT BE USEFUL AND ONES THAT ARE USELESS.
You might not have these in your wool stash.

Play with them,
Make up colour storys, blend them .... paste them in books. Rip them in half or quarters and create something like the pears from the last post.
Make a story board of your favorites.
Take a picture you love and find all the colours that are in it in chips. Paste them as a border or stripe beside it in a colour journal.

Okay I've nagged you enough ... if you are hungry , eat up !

Tuesday, May 20, 2008

Rearranging Resources


Well, it has been a few days since I had breathing room to even think about blogging.
We can all thank Mary Anne Wise most heartily for taking some pictures during class because goodness knows I didn't even though I had two cameras.

We did a fun and creative exercise in class and soon realized how useful it was for colour studies of things we might want to create.

Here are the parameters if you wanted to try it.

Decide on a subject.
We chose pears.

Grab a magazine and rip out pages with colours you want to use in your object.
Define your outside edge and use pieces of the pages ripped into small chunks, slivers, squares or whatever shape suits you.

Glue down the shapes to create your three dimensional object.
Take a look at it from a distance.... does it need improved ?
Just lay on whatever you need to create your ideal.

Here
is what the hookers did in class.

Saturday, May 17, 2008

Does Cheddar need to be on everything ?

Yes my friends, here it does.
That answered I must say this is a beautiful place we are in.
We had bit of a mishap with our booked room, but now are settled into a lovely room and are as happy as bugs in a rug.

Yesterday was the first day of class and I'm puffed up with pride and happiness with my students who were clever and caught on to my ways right away. They also were so interested in finding out what kind of values they had and did serious thinking about their values. After lunch we also dyed.

Today we are going to talk about creativity and design, then we are going to make whatever we like with out new found understanding of what we like.

I wish you were here.

I hope to take some photos today for you.

Wednesday, May 14, 2008

Day 2

We are tired bunnies. We went to bed too late, we got up too early and we ended the day driving thru Chicago. It was pretty downtown. It was rush hour. We got to see all the pretty sites when traffic was at a standstill. Sites of interest:
A turquoise seagull- yes it flew and was real. Try to explain that one.
A nest of three starlings in the letter a of a Hardees sign.
More signs than any two people need to look at, it is almost to the point of visual pollution.
Going off to bed,
Wanda

Tuesday, May 13, 2008

I am on a Lonely Road and I'm Travelling Travelling Travelling

Well, not so lonely as I 'm travelling with my daughter Thea
After a few narrow misses of nearly forgotten passport and missing night wear and several parodies of the moving out scene in The Jerk , ALL I NEEED IS THIS ___________ and cramming yet one more item into the car...... we hit the road.
All was completely uneventful. We had a great lunch when we arrived in Thea's other home and I spent several delicious hours looking every where in Chapters while she did work and other stuff.

It was so nice to spend all that time in the book store because I'm only in one about twice a year and on the way somewhere else and always in a hurry usually.

Here's what I found:
Style Statement- this book promises to or rather invites you to make more powerful personal choices, to communicate all you are in all you do.

Paul Klee Painting Music. This book show cases the work of the artist Paul Klee. My friend christine compelled me to look closer at his work. I'm deeply interested in the shapes and layers of it all. COLOUR WORKED WITH COMPLEXITY

Julia Cameron's How to Avoid Making Art
This is a tongue in cheek look in cartoons on how we keep ourselves from DOING OUR STUFF.
For instance. Take every phone call. Or Complain about not having money for supplies as you gulp down expensive coffees with friends...

Jokes every man should know.

Magazin art

Cloth Paper scissors Studios

Celtic Messages because I like the little pictures on them and they used a repeated palette which I love to demonstrate what is possible with a few colours.

Soul by Tobsha Learner

And an Oprah Magazine.

I also went and visited the mysterious gypsy " the Tattooed Lady" in her glittering tower while in London. Yes, picture that. The views were lovely.
No hooking , picture taking or dyeing was done today.

More tomorrow !

Tuesday, April 29, 2008

Old Recipe - New Method

Daughters of Darkness

Yesterday I needed dark yellow and blue greens, VERY DARK.
I had every available element and outlet occupied.
I decided I would dye in the oven as well and try some of my very dark recipes.

I dyed 1/2 yd of natural in the spot dye method but I mixed all the dye colours in the solution as though I was going to do a straight up dye bath.

Instead I poured it over the wool, mashed it up until I felt dye covered everything nd popped it in the oven.

The results were spectacular.
Will post picture later.
Here are the RHM recipes I used so I wouldn't have to type them out for you or try to remember what I did !!! LOL

EAGLE NEBULA SKY
1 tsp. Brilliant Green
1 tsp. Black

ALIEN
1 tsp. Black
2 tsp. Yellow

Insipration

I have had several days, perhaps it's weeks now, of intensive dyeing.
Two things come to mind.
#1 It's damn hard to think of colours to create.
One of yesterday's task was to fix up the blue green pile which is customarily about 3 ft high. It was down to about 2 feet.
I look through the pile to determine if any of the colours are duds and to see what I'm missing in the value and saturation department as well as warm and cool.

I redye the duds. Fill in the missing blanks. And frankly I do this for me, to change my view of the wool, I get tired of looking at the same old stuff. Also it helps me to better help in the colour planning of client's rugs.
So as I'm doing this I find I'm blank minded about what I want to create. I know I need to make 6 different medium darks, and several medium lights. And I have several dyes that are blue green but I'm leery because I often create the same colours in this blue green world over and over using completely different dyes. If only I had something to look at to inspire me.

As soon as I have a moment I'm starting a visual journal for each colour. This way I can have somewhere to turn when I'm making colours.

You might be asking why I don't turn to a dye book or perhaps my own RHM recipes ?
Well.... I don't dye that way. I like to create new as I go along. This way I develop collections of colours that are "current " and don't keep rehashing the same stuff again and again stagnating myself and my client's rugs in the process.

#2 My feet hurt. Soon I will be of them for Wednesday and Thursday as I finish off some rugs for display in my booth.

Tuesday, April 15, 2008

Dyed Nylons Today

Wow !
I've even impressed myself, I dyed over 50 lbs of nylons today. My feet are killing me though....

One beautiful combo use the equal ratio
Military , emerald and dark green from Aljo dyes
Spot dye or pour over wool in dye bath, one at a time.

Another:

Blue,Turquoise and Blue Violet, Majic Carpet dyes

Noticed :
One interesting thing about dyeing these is the rate at which they absorb the different colour contents of the dye.
I used a vast amount , about 1/2 tsp of PC 503, threw in the nylons , about 7 and left them, when I returned the water was pure strange yellow and the nylons were a dull dark NAVY !!!

Also Avocado about 1 tsp , in a dye bath yielded me about 4 terrific different greens as I added nylons as the dye was absorbing.

Monday, April 14, 2008

I Love Reds


Yes I admit I love hooking with red, what a change from my 20s. When we moved into a house with a bowling alley length living room with a red floor I BLANCHED inside and out and vowed to wear sun glasses. But now I love red and try to use it whenever possible in my home and work.
Jules Feiffer said :
Artists can color the sky red because they know it's blue. Those of us who aren't artists must color things the way they really are or people might think we're stupid.

I have spent a whole week immersed in the colour red. I dyed up several terrific recipes for RHM and even made some comparison ones for Pro chem users.
The original Majic Carpet colour is on the right over natural and the Prochem one is on the left in each picture. You can see you can't really make a direct transfer but the reds are still beautiful. Even if you don’t own Majic Carpet dyes you can still make a stab at some great reds

Gabriel Garnet Dyed over 1/2 yd natural with Majic Carpet
4/32 Tsp. Red
1/32 Bottle Green
2/32 New Formula Red Violet

I dyed these over 1/4 yd each.
First I choose to “translate “ Gabriel Garnet into “Prochemese”

I retitled it - Imitation Gabriel Garnet
2/32 tsp.351 Prochem Bright Red
1/64 tsp. 725 Prochem Green
1/32 tsp. 338 Prochem Magenta

Please note I followed the same measures ( these were cut in half because I dyed 1/4 yd, not a 1/2 yd as per the original) and came up with a delightful red, though not the exact one. For a possible correction to the Imitation try adding 1/64 th magenta and 1/32 Bright Red and a hint of some blue.

Next I tried Hanchett’s Vermont Barn. Not able to approximate the chocolate brown and moss green accurately with out lengthy recipes I opted to use Brick to do the work of the brown and green.

Hanchett’s Vermont Barn In Majic carpet
4/32 tsp. Red
2/64 tsp. Moss Green
1/64 tsp. Chocolate Brown

Hanchett’s New Hampshire Barn with Prochem
2/32 tsp. 351 Prochem Bright Red
2/32 tsp. 255 Prochem Brick
Shown with it’s Majic Carpet counterpoint you can see it isn’t exactly the same but it is a very good red. For a closer call add the same formula into the dye bath again.

Thursday, April 10, 2008

OHCG Annual Show Midland Ontario Canada


Winner of Last year's Theme Award "Blossom Time " in Belleville
And the Day came

I wanted to let you I'm going to be in at the OHCG Annual Show as vendor.
“HOOKED ON HISTORY” is the 2008 theme. Date: May 2, 3 and 4, 2008. Location: North Simcoe Sports and Recreation Centre
Midland, Ontario. It is open to the public on Sunday.
If you come to my booth and tell us you read my blog you can pick a pair of dyed nylons up or something from the dollar bin for free.
This is a good show with great diversity and there are many terrific and varied vendors. I hope to see you there.
Here is the OHCG website for more info.

http://www.ohcg.org/

Tornado Sky


Last year I dyed an interesting sky using the following method I wrote in RHM.

If the colours represented don’t suit you, being a little on the glowy side, just add a bit of their compliment ( the colour opposite on the colour wheel ) to the dye formulas. Though I would encourage you to try a sky that is bright... just pep up the other colours you use in the rest of the rug.

This method is dyed over 1 yd of natural wool with Majic Carpet dyes, if you don’t have these use a likely substitute, have a little fun.

The Big Kettle Method
By now many of you already have a big soup pot or canning kettle you got to try Wandering or to dye yard lengths. If you don’t have a pot like this yet they are very useful to include in your dyeing paraphernalia. Buying one may seem like a bit of an investment but you and your beautiful rugs are worth it.

Fill your soup kettle 3/4 full, set on stove to heat. You might want to make sure your kettle is impeccably clean because we will be useing small amounts of dye and the least little speck of dye on the pot from your last session will corrupt your recipe. Though having said that I honestly love what happens when I use a “dirty “ pot.
Soak your wool thoroughly using synthropol. Have a bowl or pan nearby to place the hot wool in.

SPLENDID SKY

Formula One

1/32 tsp. Red Violet
1/256th Brilliant Green ( just use a tooth pick ) This colour dulls the red violet, just don’t add too much or your sky with be a purplish grey which is lovely result if that’s what you want.

Add Formula One into the water (dye bath) in the kettle.
Arrange the yard of wool so the selvedges are running up and down and you have gathered the wide edge in your hand.

Hold your wool by the upper 1/4 and immerse it into the dye bath to the half way point.

Just hang on to it and swish it around, no dipping. If you want this wool to have a bigger section of more let it go into the water 2/3 of the way now.
You might notice the colour gets taken up pretty well without acid, but add 1/32 tsp. at this point.
NOTE: If you are stature challenged as I am stand on a sturdy step stool, be safe.

As the water begins clear dip up to the 2/3 height then finally let the whole piece submerge.
When water is clear, remove the wool to the pan or bowl, cool it off by rinsing in cool water.

Add 1/128th tsp of Yellow into the kettle, stir well.

Arrange your cooled wool as described before but place the other end of the wool into the dye bath, the lightest end.

Swish around as before, immersing your end in as far as you want yellow to appear, when yellow and pink cross orange is what appears, or in this case peach.
Dip your wool in deeper as the colour in the dye bath disappears, swishing as you go, creating smooth transtions from one colour to the next.

After the dye bath is clear, remove wool and cool.

Next add 1/64th tsp. Blue into your kettle, stir lots make sure none flew onto the kettle sides, creating glories and merriment you might not want.
Now arrange your wool as before and lower in the dark end, the one that is pink.
Swish and dip as you see fit creating the sky you wish.Once again as the colour disappears dip more of the wool in.

Remove wool when dyebath is clear, cool , rinse thoroughly. Acid left in wool is not good for wool longevity.

This took me a total of 15 minutes. I wasn’t reading directions and I knew what to do but soon you will be whipping these out in no time too.
You might notice this wool looks a lot less “smooth” than traditional dip dyes.
The colour transitions are still subtle but there are up and down striations that are lovely to hook. There are two ways to use this wool: keep your wool in order as you cut it by taping it down to a piece of paper or let caution go to the wind and hook it as you pull out each stripette from your basket. Both have their own beauty.

For the Tornado sky I used blue violet on one end and Brilliant green on the other end WOW !
Today I finally sold it to a lady who wished to use it for an aurora borelais in a deep blue and violet sky.
It looked a somewhat dull colour but against the dark sky it was tremendous and glowing.
See picture for a collection of different colours dyed this way.

Dyeing Reds

Yesterday I was dyeing a bevy of beautiful reds for RHM. I was surprised to note the rising of my blood pressure and a mild anger forming.
Hmm could the old colour and mood influence be true or am I just a crotchety old dyer ?
LOL
As more evidence in the case, I was promptly relieved when I discovered a 1/4 yd of orange and 1/4 yd of yellow plaid wool left over and dyed them turquoise. I actually felt the stress leave my shoulders, I took a deep breath when I saw it begin to take
up .....
Do you think I should ask for stress pay ?

I had a red dye mislabeled by the factory that did cause me some heartache so all the tension might not be from the immersion in colour red only.

When dyeing reds you need quite a bit of dye, over a quarter yd. upwards of 1/8th tsps or more. The reds can be very garish too, try tempering them with 1/32 yellow green , blue green or black for interesting depth, or dye reds over already red wool or yellow, orange or fuschia wool or light green or blue green or violet or tan...... heck you can dye reds over anything !!!

Go for Broke !

Sunday, April 6, 2008

Getting Organized

Sometimes it takes quite a bit to get organized but once you do the steps you are on maintenance.
I hired someone to keep me on top of tasks because I'm easily distracted.....oh look at that pretty blinking line running ahead while I type, don't you love the sound typing makes, I'm hungry.....
you get the picture.
I am highly organized while I workcreate ( dye, make, hook) and when I workinspire (teach) but when I do workmath or workwhen am I supposed to be there and workwhat is my subject ? things can get a bit slippery if I'm highly involved in the first two.

But I don't feel the least bit worried about this. I would rather have my free mind to engage in acts of expansive and creative thinking on a big scale than worry about my daily minutiae. Nothing wrong with hiring a go getter to do the things they love that help you and help them as well.
It is very enjoyable for me to feel the support of the "committee" as we work solving and examining possibilities.
NEW IDEAS FROM A FRESH SOURCE !

Long ago I was a clothing designer and I had little kids. Surprisingly they often wanted to eat. I often didn't want to switch off my create to cook or even think about what to cook.
I took 60 minutes of my time and created a list of 20 things I could make for dinner and a coordinating grocery list on the computer.
14 years later I still consult those lists. The relief I feel at knowing it's there to rescue me if I need it is HEAVEN. You can build you own support committee by figuring out what will ease your day and reduce stress and getting helpers ( human or otherwise )

Ask for help
Don't suffer
Be realistic
Be good to yourself, who else knows what you really want and need ?

Monday, March 31, 2008

Redwood


Today while out walking I saw a curious colour in a stream bed. This brook travels downhill and each step had a orangish glow on the edge.

Redwood
over 1/8th yd. using Majic Carpet Dyes.
Dyed in a crock pot, very little stirring, add acid at the 5 minute point after adding wet wool and dye.

1/32 tsp. Reddish Brown
1/32 tsp. Yellow
1/32 tsp. Chocolate Brown

Sunday, March 30, 2008

Hints for dyeing

Save electricity and don't fill your cup up to the top. 1 CBW ( cup of boiling water) is overkill.
When dissolving your dye particles in boiling water you only need to use a few tablespoons at most 1/4 cup.
Top it up with cool water, it is safer to handle too.


Replace vinegar with citric acid crystals for fume free dyeing.


Don't be tense when dyeing, put on your "happy " music.


Make something perfectly nice, then think about how to make it glorious.
Enjoy the adventure of it.

Tuesday, March 25, 2008

Use of Yarn Sample


Believe it or not I used the yarn shown to create strands of hair in my rug precious.
Where it turned blue and light brown it looks like light shining on it !
It all happened with planning !

Yarn Dyeing


I love having hand dyed yarn on hand. Of course to hook or bind with but also to knit.
I look for yarn that is not white (meaning a lighter shade of natural) so if I want to felt it I can.
It has to be close to 100% wool though silk and wool blends and nylon and polymide are dyeable with our wool acid dyes.

Here is how I dye it.

I like to use the electric frying pan for this.

Make sure your wool is arranged in skein and is loosely tied in four points. Wet it.

Make three to six colours of dye in jars with acid/ vinegar added, use 1/2 cup of water each.
If you want something tame as pictured, use colours that are somewhat dull. I used slate blue, clay and weak mahogany.
You will be surprised how this type of wool is useful in hooking.
I also like to use exciting colours to dye with. Have some fun with your choices. Be aware it will be dulled down through the process of hooking and knitting which creates a speckling of the different colours and consequently individual colours amalgamate to create a whole.

Lay your wool in the frying pan, try to get it as much of it in contact with the bottom of the pan as you can. DO NOT ADD WATER.

Turn the heat on in your pan. I use the high setting.

Pour the first colour over the wool in a cross. Wait for this colour to mostly take up
Pour the next colour in a cross beside the first cross rotating to the right with each new colour.

Work in this pattern using all your colours one at a time.

Heat until all colour is gone from the dye bath.
Rinse by hand.
Roll in towel to remove excess water, hang to dry.

Wednesday, March 19, 2008

Impediments

We all have things that will keep us from what we do best.
Recently I purchased a new battery for my laptop. I didn't realize how much I had enjoyed the freedom of writing from my bed, couch, table or deck until I was able to do it again.
The two year long, eventual dissipation of my battery was a slow, slow trickle of constraint.
I guess I'm not a tethered kind of girl.

But I didn't know that until I got unplugged again.


I said all that to say this... are you doing everything you can to provide yourself with creative outlet ?
I'm not talking about stuff necessarily.
Because we all know people who have tons of "stuff" but do nothing.
Something else impedes them.

Do you know your impediments ?

The question to ask yourself :
I can make the most wonderful things, why am I not ?

This is something I ask myself.
Be honest.
Make a checklist of things that help you make wonderful.
Your preparedness list.
Look at this list and pat yourself on the back for your state of readiness.

Now make a list of things that may retard your wonderful.
Your to bad about - no time, no energy, no money, no talent, no good list.

Look at the No Good list.
Examine these like a trouble shooting ,problem solving whiz kid, taking over the company robber baron.
Can any of these be debunked, raided, smashed or rent to be put of commission ?
Can you slash a tiny inefficiency to create a whole new company ?

Just one will thing will make a world of difference. What small thing can you do to get where you want to be ?

Something like getting my laptop mobile again.

This message has been brought to you directly from Wanda's couch in Wanda's partially renovated re-purposed new dining. Free from all wires.

Tuesday, March 18, 2008

Thinking about possibilities

This morning I was surprised to follow my monkey mind train of thoughts and realize I was thinking about what if questions.
I usually don't pay that much attention.

Let's make this a what if day in the dye pots.

What if I used a view to inspire the colours I pick to colour my wool ?

What if I acted truly risky with my wool, didn't worry about "wasting " it ?

What if I gathered up the wool I have already dyed but no longer care for and give it a makeover ?

What if I go to the second hand store and look for a new pot or pan to dye in and see what I can invent ?

What " if " will you explore today ?

Monday, March 17, 2008

Pastel Version of colours used


Here is a photo of the pastel version of the colours though this time I subbed in colonial blue ( Pro Chem ) for Navy.
Wondering why ? I was concerned I might not get the quality of pastel I wanted with the dark heavy navy and choose a lighter happier blue.

Dye something fun today.

Tuesday, March 11, 2008

Four Colour Revolution


Today, being bored and not wanting to look for new colour combos every 5 minutes, I tried dyeing several things with the same 4 colours....

PC Shamrock
PC Navy
PC Magenta
PC Yellow 135
Pictured are the combo in equal proportions over 1/2 yd.lilac, 1 yd natural, small pieces are echoes of the one yd piece.

I have another still in the dryer of a pastel from the same 4.

Dyeing All Week


This week we had a wonderful time dyeing all week. One of our activities included making stacks !
Here is the picture of Christine's stacks. She included a piece of natural on top !
Both stacks used the same wool. Beautiful !!

Monday, February 25, 2008

Summer Polish and Caramel Corn


OVER 1/4 yd of natural wool using Majic Carpet dyes in a dye bath until water clears
SUMMER POLISH
1/128th tsp. Orange + 1/128th tsp. Chocolate Brown

What’s a darker version look like ?
OVER 1/4 yd of natural wool using Majic Carpet dyes in a dye bath until water clears
CARAMEL CORN
1/16th tsp. Orange + 1/16th tsp. Chocolate Brown


href="https://blogger.googleusercontent.com/img/b/R29vZ2xl/AVvXsEhBwoG-rdKiF9nJRu2hq59G-wI50Iv5bG-GW71Z-I5mu4KAK5TuLr4I19zjCaAnBpknVsITnwi3du2Mue4s6J3LJOBdWSzjTZSCxgdCy4ZVBcjcLqBzv0pFO2wv6XGnW_L0j5MAoRzlEAg/s1600-h/%2317+Caramel+Corn.JPG">

Thursday, February 21, 2008

Drew ! another great colour


Drew is my daughter's fiance.... a terrific fellow indeed !

Over 1/4 yd lilac wool and 1/4 yd. natural
Dyes added to dye bath simultaneously.
1/8th tsp. Prochem Brown 503
1/8th tsp. Prochem Clay 516
1/8th tsp Majic Carpet Seal Brown

Denise - a great colour !


I have a very wonderful friend who says there is just not enough brown and it made me excited to create something brown that is BEYOND brown, brown with merriment, surprise , a sense of humour and a touch of rebellious fun.

Denise
Over 1/4 yd. sage green and natural
Apply these dyes one at a time into the dye bath with the wool already in it. Add acid to the Seal Brown dye solution.
1/8th tsp. Majic Carpet Seal Brown
1/16th tsp. Aljo Aubergine
1/16th tsp. Prochem Orange 233

When the water clears you are done.

Wednesday, February 20, 2008

Some great tips on furthering our hooking from Last July

198 Words to Remember from Wiarton/07

It is better to really see than to just look.

New experiences create new ideas.

New thinking creates a renewed life.

Hook what you know (and what is right for you ).

More is better than less with colour, use like values that blend.

Be outstanding with dynamism in the use of colour and design.

Time enough for dull when we are dead.

Go for the gusto, be fearless, the Amelia Earhart of hooking.

You are your own magic wand, twirl it around a bit.

Each day is a new page to be written on ..... what’s your story ?

Just say no to what doesn’t fit with you.

BEWARE THE CRAB POT !!

Pay attention to the small things and the big things will always take care of themselves.

Got a colour problem ? The answer is always in the rug.

The colour you don’t like enhances those you love.

You deserve it ! The mistakes, the joys, the triumphant ticker tape parade.

Make goals, have everything you do support them.

Don’t look to what’s been hooked already for direction, look to the source.

The answer is always YES !!!!

Tuesday, February 5, 2008

Smoky Blue with Prochem/ Smokey Purple with Majic Carpet

This is a "use your trust and imagination" exercise.
I'm pulling this recipe out of the ancient archives, and there were no technology for pictures back then.
Dye this over 1/4 yd. wool in a regular dye bath.

This is a beautiful medium value colour, please dissolve in 1/4 cup boiling water topped of to one cup with lukewarm water

2/32 tsp Prochem Blue 440
1/128th tsp Prochem Sun Yellow 119
1/128th tsp Prochem Magenta 338
1 toothpick Prochem Black 672

For a close Smokey Purple using Majic Carpet Dyes:
Over 1/4 yd.dissolved in 1/4 cup boiling water topped of to one cup with lukewarm water
2/32 tsp Blue
1/128th tsp Yellow
1/128th tsp Red

Try combining both these formulas over 1/2 yd of natural, or over a yd for a lighter colour.
Try using these for a spot dye.
Have fun ! Let us know how it goes.

Tuesday, January 22, 2008

Making a stack !


Stacks
I used a variety of textures that ran from dark to light in the same colour family. It is hard to tell the value of textures sometimes but I choose my dyes carefully to influence my choices. I dyed them laying the dark wool on the bottom and working through the values to the light. This way I can have a variety of values to work with that relate.
You Need:
flat pan long enough to lay your wool almost flat (wrinkles are GOOD !)
6 Dyes of your choice, one each for each layer
Acid
6 pieces of wet wool 1/16th yd. each

Directions
Lay the darkest piece of wool, Value 6, in your pan.
Prepare 1/32 tsp. ProChem Mint 723 in 1/2 cup of very hot water with a sprinkle of citric acid.
Pour this dye over layer one. Try to spread it around fairly evenly.
Place the next wool layer ( Value 5 ) straight onto the first one.
Prepare 1/32 tsp. ProChem Herb Green 709 as directed above and pour over this layer.
Continue laying on the values of wool and the dyes:
Value 4 is dyed with 1/32 tsp. ProChem Evergreen 729
Value 3 is dyed with 1/32 tsp. ProChem Shamrock 735
Value 2 is dyed with 1/32 tsp. ProChem Grasshopper 719
Value 1 is dyed with 1/32 tsp. ProChem Key Lime 724

Place in oven uncovered at 350˚F until the water clears.
Don’t forget to use really hot water while mixing the dyes, it makes the dye take up quickly.
I encourage you to try this any way you want to over any wool and dyes you have.
Try using different colours of dye and the same colour of wool.

Friday, January 11, 2008

Recent Book Purchases

Happy New Year All !
This is a time for me to learn something new ! I especially like to explore other people's creative endeavours.
I found some good books about creativity.
The first one I found in Colonial Williamsburg.
401 Design Meditations by Catherine Fishel

ex.
It's been very important throughout my career that I've met all the guys i've copied, because at each stage they've said ,"Don't play like me , play like you."

Eric Clapton musician


This one I found in Morgantown, West Virginia.
Kaleidoscope ideas + projects to Spark Your Creativity by Suzanne Simanaitis
This is visually stimulating book. It is a compilation of lively artists and their thoughts and their suggestiond for you on the subject of creativity. It really is a kaleidoscope.

The third one I ordered from amazon.

Living The Creative Life - Ideas and Inspiration from Working Artists by Rice Freeman Zachery
This book explores real lives of artists in the trenches , so to speak. I'm not meaning the suffering artist type stuff but real, practical comments from people who are "doing it '

Try doing something creative this weekend.
Do something that makes you filled with joy.

I'm going to.

Saturday, December 22, 2007

Looking after yourself in this busy season

Will the world fall apart if you don't do everything on your list by Christmas Day ?
Having a happy person around is the best gift you can give, not to mention how contagious true contentment and joy is to those who observe it.
Do things because you want to, not because you have to.

Saturday, December 15, 2007

Answering Lawanna's comments


Lawanna asked :

Hi, Wanda

I have bought wools from you that glow. How do get the glow effect from the dye pot?

Also, what do you mean by not taking the "joy" out when you have a lot of clouds or snow?

Thanks!

Lawanna


I love things that glow !
In the dye pot there are ways to accomplish this by using the same thoughtfulness as when we want to create glow when we hook.

Use the knowledge you have of using light against dark, bright against dull, cool against warm , complementary.... you know what I mean.

If I want to make a glowing blue, I would use some turquoise in it.

Glowing red I would try having some orange spots, or fuschia ones.....
Does that make sense to you ?


Taking the joy out ... that means using a white that isn't the correct one for the palette. A wrong white can really ruin the effect we usually want from that white.

You want the clouds or snow to reflect the surroundings, Try googling images of cloud or snow and you'll soon see what I mean. Paintings especially point out the importance of "the right white " or what will appear white or act white for any given palette. Paintings are more apt to be using expressive colour or more imaginative or enhanced colour than we might be able to see. Take look at the picture of the birch tree, my it was like looking at a rainbow !!!!

Taking the joy out, or settling for any old white will leave your white areas flat looking.
Does this help?

One thing that will really point out the importance of the correct acting whites (or any colour for that matter ) is a site called segmation.com

Look for a snow picture or a sky with clouds.
Click on segplay FREE > choose a pattern.
Thanks for asking dear Lawanna.

Friday, December 14, 2007

Light Backgrounds- How to make them sing

Where I started hooking light background were the bomb , most every one used them most all the time. As an avowed daughter of darkness I wasn't too interested in them but did notice they did not often "match " the motifs in the rug. Dyed with various tan, brown, gray type colours they seldom had the reactive, supportive influence on the leading ladies we might desire.

I've had very good success dyeing light backgrounds with vivacity the following ways:

Making a very light spot dye of the colours contained in the motifs.
You might first examine if the colour should swing to the warm or cool. For instance, if my rug is composed of blue and purple pansies I might chose to use a hint of warm purple, the warm green, caramel and gold you find in the pansy center to create my spot to alleviate all the cool flowers and to further intensify the coolness by laying them on the warm background.
The pastel value spot is a great way to enhance what you already see in the rug and it's quick and easy.

Another way I like to go is to dye up pastels of 9 or so of my dyes from different sections of the colour wheel, making them all the same level of value and intensity.
I use these all together by ripping all the pastel pieces in half , cutting these up, throwing them in a bag and hooking them as they come out on half the rug. When it's done cut up the other half of the pastels and carry on completeing my rug. This is terrific ! You can throw a tied off hank of yarn into each dye bath if you want yarn to match the edge too.


Make sure you light background is not something that takes all the "joy" out of your main picture.
This would include any areas of light colour in a rug, white house, clouds,snow, you get the drift ! ( that was punny )
Happy and expansive hooking.
BTW
If you have any questions at all I'd love to answer them, just send them into the blog....

Thursday, December 13, 2007

Question about glow in my Rug October

The Divine Lawanna Holmes of Minneapolis MN said
I love the way the colors glow ( in your rug October). How did you do
that?

I am Big on the Glow !!!!
I make it happen a group of different ways.

Visual Excitement:

I use opposite colours together!

Blending:
Using like value and temperature colours to create one ( I usually throw in a close but other temperature colour in there like burgundy with a mostly blue, green, purple situation.

Gradation:
If I'm making something red as I go toward the edges of the motif I'll switch to orange, then yellow if I want to really make a BIG glow.
You can do this with cool colours too, just always work toward the bright.

So If I'm making something blue, I could layer blue violet on the blue, then violet, the red violet.... OR I could go blue to blue green to green to yellow green. One of my hookers is doing just that in a sky, she is indicating a glowing dawn with a subtle yellow green on the horizon. Go Dayle !!!

Sometimes I build gradation into the wool by having a piece dyed that travels through 3 colours and creates 2 more where they overlap and combine in the pan. I just hook that wool as is and it glows because I usually dye it from a lighter colour to a darker one or a brighter one to a duller one.

This brings me to
Settings and Jewels. I use a dull background with a brighter motif and that creates glow but the dull you chose needs to relate well to the bright and they must enhance each other.

Light against Dark
Here is the last way I create glow.
I make sure I have places where there are good degrees of value separation between my motif and background.

If you have a comment or question please ask !

Wednesday, December 12, 2007

Great Backgrounds


There comes a time in every hooker's life where we want more stimulation from our backgrounds.
I'm of the school that more is better.
Especially in backgrounds.

If you can have minor variance in colour from a source of leftover stuff or from one off the bolt colour of wool wouldn't that be great ?

There are two ways to go about this for dark and medium backgrounds.

Method One

Grab a bunch of various coloured wool from around the whole colour wheel.
Over dye them in a big pot with lots of various colours close to where you are aiming for ..... for blue try adding 3 blues, turquoise, violet, blue greens and a wild card like red violet.... you get the picture. I use dry dye added into the pot at different points. NO STIRRING at first. Add acid about 15 minutes into the process. Wait 5 minutes and stir, leave until water clears.

The footstool background pictured is hooked with one of these giant stew pots ! Michele Micarelli showed me this trick.

Method Two

Divide your yd goods into 1/4 or 1/2 yd pieces if it is a big rug.
Decide what influence you want to employ, a cool collection of wool, warm or a combination of both.
If I had eggplant wool I wanted to enrich to be cooler, I would add a cool colour, blue, green , purple to each 1/4 to 1/2 yd. piece.

If I was warming up eggplant I would over dye each piece with one warm colour, orange, yellow, red, brown, red violet.

I usually take the combo route so will seek to do some colours from each side of the colour wheel.
ie: blue for one 1/4, brown for another, violet for the next, orange for one and red for another and so on.
Each dye subtly influences the original colour and used together it's glorious.


Once these are cut up and used randomly they create a glowing effect much better than an a flat or mottled piece of one coloured wool.

I tell you about making terrific , easy and individual light backgrounds soon.

Monday, December 10, 2007

Rug October


Hi All,
This journal rug challenge from the Welcome Mat felt like it might never get done. But sure enough, one loop after another I finished last night. Now on to getting Rug November and Rug December on the go tonight. I'm doing a picture of pixelated pears for November with my dear friend Lawanna, she's hooking it too, and a portrait of my daughter Thea that glows. Into the light we go !

Monday, December 3, 2007

Colour and Rug hooking


Once you learn how to bring up a loop the only thing we need to know is how to use colour effectively.
We might be good at putting colours together, but are we good at making sure our rugs have value contrast ?

Not usually.

We don't have areas of really dark to really light in our rugs.

We have one or the other or lots of medium values.

This does not make for a glorious rug.

To see rugs from a distance and let them still have discernible motifs and drama we need think rethink how we use colour as rug hookers.

To recognize the values ( light to dark ) as you colour plan look through a camera set to black and white at your wool selection.
You might be surprised how many of the very different colours you chose are the same value. And how they will blend and bleed together as your rug is viewed from any distance, say over 8 feet.

Here is a picture of wool, and the same wool in black and white.... hmmmm
What do you think ?