Friday, December 5, 2008

Day 5 what I made today


Here is a part of the yd of wool I dyed today for a background for a cats paw type rug.
In a giant dye pot..... wet the wool first , have the dye in the dye bath before adding wool. Add acid after the 10 min. point. Heat until water is clear. Rinse thoroughly, hang or throw into dryer to dry.
One part black
One part turquoise (majic carpet )
Two parts blue
1/8th part moss green
1/8th part bottle green


I can hear you right now... what are you talking about you crazy woman ... parts ????
Well, here is the story.. I dyed a yd. so my basic part was 1/8th tsp.
You might be dyeing a 1/4 yd so for the same value you would need to have your basic part 1/32th tsp.
Ratios are so much easier to expand or contract.

Go forth and create you amazing beings.

Chelsea Rolls over Medium Dark Purple


In this picture you can see the wool before dyeing on the bottom right. The chelsea rolls arrayed out on top of it, and to the left is an echo I placed on top of the wool in the pan with natural wool to show the colours of dye I used on each one. Though the beginning colour is not eggplant you can achieve similar interesting variances.
The best dyeing advice I can give you is just go for it, you can't really go wrong. If it seems implausible, you should really try it. Like I said to Christine today, this idea , to go for broke is what separates the men from the boys.

A Bolt of Eggplant - what can be done ?

On Tuesday I had a great question :


Well, it's -22C on this overcast Tuesday morning around 9:30 and it's just starting to get light. The dull morning reminded me of the whole bolt of dull egg plant coloured wool I purchased last year and what to do with the dang thing. It doesn't bleed much and really, it is just simply brown.
I wanted a rich egg plant wool like the photo showed, any suggestions to bring it to life?


Eggplant is a deep rich colour but it can be terribly boring as well.
My advice for anyone with a plethora of one dark colour ( equals boring ) is to divide it into 8 parts, the amount you divide is up to you, according to your needs for a background say.

Find 8 BRIGHT dyes.
I overdye the each piece of eggplant with one of the bright dyes. 
Colours I might use: 
yellow
turquoise
red violet
red brown
orange
violet
blue
green

You will end up with an array of lovely off shoots of eggplant, some warm, some cool, some dull some bright, but all dark.

You can also make chelsea rolls with eggplant in smaller pieces about 1/16th or 1/8th of a yd works.
Use 8 pieces of wool, the same 8 colours. They will co-mingle and create a pieces of interesting spotted array that all go together. 
Here are the instructions for making generic Chelsea rolls.

The Chelsea Roll
Using only one fabric like natural or a blue or gray you can have lovely variations to use together in tons of ways. Textures work wonderfully too. If you use a variety of colours in your chelsea pan you will get a whole different set of miraculous set great wool. This is what I choose to show you.

You need:
WOOL
8 or 12 pieces of wool about 18" long and about 4" wide in colours of your choice.
Wet the wool using synthropol, jet dry or hair shampoo without conditioner. All of these will wet wool almost immediately. It only takes a few drops.

A PAN
I call this THE CHELSEA ROLL because our wool looks exactly like a chelsea roll/cinnamon bun sitting in the pan. Look for a flat pan like an cake pan or any flat surface pan with some depth. If each piece of eggplant is 1/4 yd, I would use 1/4 tsp of dye in 3/4 cup of water, make sure your pan is deep enough to hold the water needed to dye 8 pieces of wool.Once a kitchen tool is devoted to dyeing that's the end of it’s cooking life. If you have no pan go to the grocery store and pick up an aluminium cake pan. When you use it place it on a cookie sheet for ease of moving in and out of the oven.

DYE
For more dynamic results use one colour of dye per piece of wool.
One of the biggest hang ups we have as dyers is the inability to just go with something, we think we need exactly what dyes are suggested. Making substitutions can really free us up to use our eyes more instead of recipes.
If you chose colours that are alike, greens, blues, purple or yellow, red, orange that will get you a blending type of wool, you could use for a hill or water or sky.
If you choose colours from around the colour wheel you will get lots more interesting variations. When colours bump into each other they create new colours. Try both ways. See the side bar to help relate the dyes to wool and what you desire in the end.

Don’t forget to add a pinch of citric acid crystals to each dye formula.

Directions
Have your pan ready, your oven on at 350˚F , your water boiling, your dyes picked, your wool wet.

Pick up a piece of wool place in your pan and roll it in a spiral.
I usually grab hold of the end of the wool strip and start turning it around like I’m getting pasta on a fork, do this loosely. It should look rose like. Do all 8 or 12 rolls.
These rolls can touch each other in the pan and I encourage them to do so.

Here is what one roll looks like.


Next prepare your dye. Dye the rolls one at a time. Pour the dye directly onto one wool roll. Let the dye go where it may. Continue on until all the rolls have received their anointing of dye.

Using a bottom of a jar or a specially assigned potato masher press down firmly on each roll in the middle of it once. Don’t clean the jar or masher. between rolls. Don’t touch the wool again please. I beg you. Please don’t add more water or cover. Place in oven until the water is clear.

Here is what they look like in the pan after dyeing. These were dyed with greens over medium colours but you can imagine what will happen with darker ones.


Thursday, December 4, 2008

Day 4 - What I made today .... My podcast

Hi ,
 This podcast involved 6 long days of labour..... to hear it click on the red title Day 4 What I made today .... my podcast
You heard it here first !
 I hope you enjoy it and I hope I improve a great deal doing it.

Here is a picture of the Eureka Moment ! And no crying or dirty diapers either.


Wednesday, December 3, 2008

Day 3 What I made today

Hi All,
 Here is what I made today, sorry it's another brooch made from a sample bit of noro yarn knit up, then felted with the machine to a dryer sheet , then I added other fun bits on.
 If you look carefully you can see Birdie and a clean studio too.....

Tuesday, December 2, 2008

Dec 2 - What I did today

This is part of my out of the box project I just did .... it was due last June, you can't say I don't have perseverance. It represents the idea of colour ......part of the "tools"  I  have represented in my box. You might wonder why I'm thinking about inside a box when I was to think outside it.
Sheer perversity. By the way I had a success with my my kiltie and felting it up, thank goodness.

Making it fuzzy

Today I'm going through pieces of beautiful recycled wool sent to me from an angel in Virginia, Heather. I'm making the dollar bin glorious.
Heather has the wonderful knack of getting those twill woven kilts to thicken up ! You know what I mean.... felt in way that makes it easier to hook with.

I recently tried to shrink up some of these but I can't help but blame my washer. It is a newer model, still top loading though.
Even on heavy duty and twice washed I can't get the fluff I'm looking for.

I just put it in again, some where I read it might take 5 times in the washer to make this happen with these new low agitation models. It is kinder on our clothes but a weak tool for the fiber artist.

The gas line was installed today from road to house so soon, like my favorite saying I will indeed be cooking with gas. And dyeing of course.

Off to make something for my December challenge and clean the studio - just look at the state of it !
This photo was taken by my new computer !


Monday, December 1, 2008

Creation and Expansion Part 3

Your word to explore this week is LAYERS, this could be hens, clothing, onions or political intrigue.
What comes to mind ? What develops from there? Have an adventure with your Creative Visual Journal.


Make a thing a day program Day 1


Here is a brooch I made using all manner of silk and yarn and wool.
Proud I got a good start.

Oh !
I delivered my purse to Marci today and she really loved it. I got lots of hugs and thanks,it was FUN to make someone so happy.
She said she might be by tomorrow to visit the beast in her lair !!
Those are my words not hers.

Happy Creating !

Sunday, November 30, 2008

Recycling and Tests for Real Wool

Every once in a while wool comes my way without me seeking it. In other words I'm not buying it from my "dealer"
This unknown "wool" sometimes needs to be tested before I try it out. Pictured below are some NOT WOOL samples and one with partial wool, the tiny pieces on top are the bleach tested remains.

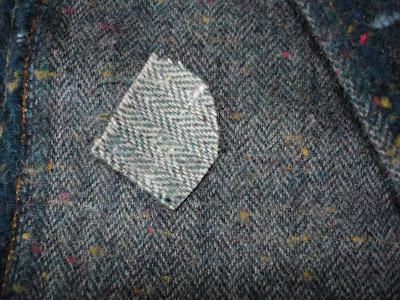


Many of you like to go good wool hunting and I hope these tips will help.

Reasons for recycled wool:
inexpensive
versatility
beautiful tweeds and textures

Reasons against recycled wool:
dry cleaning fluids
moths
not much “life” left in the wool

Rip Test- there will be a soft tearing if wool is 100% or close.The addition of synthetics creates a harsh ripping noise.

Burn Test- fabric with a high wool content will become soft ash and be difficult to ignite when held to a match. It will smell like burnt hair.
Fabric of a more synthetic base will ignite immediately burn quickly and dangerously ( do this over a sink). It will make a hard plastic ridge where burnt and stink like burning plastic.

Bleach Test- place a sample of questionable fabric in a container with pure bleach. Leave overnight. If it disappears completely it was 100% wool. If there are remains in the container they are the synthetic component.

When you are searching out wool to recycle at thrift stores or from family and friends there are four things to look for:

Weight of the wool- thick or thin ?
Width it will cut-weave loose or tight ?
Wool Content- look for label
Waste- how much wool will you end up with?

The bigger stash of wool you have the greater variety and creativity you bring to your rug and its design.
Hints:
Tabby weave is best. It looks like this:
-I-I-l-l-l-l-l-l-l-l-l-l-l-l-l-l-l-l-l-l-l-l-l-l-
l-l-l-l-l-l-l-l-l-l-l-l-l-l-l-l-l-l-l-l-l-l-l-l-l

Less than 80% wool will not dye completely and is damaging to cutter wheels. Though it can be terrific in our work if it is glorious to look at.

Ugly colours are good, you can dye them.

Shiny wool is never good!

Thin wool can be thickened by agitation and soap in the washer.

Avoid Superwash or Teflon coated wool.

Coats can be cut on a narrow cutting head if they are thick.

Blankets if thin enough and cut wide make good hooking wool.

Thick blankets and coats may be used for binding and penny rugs but do not make good prodding.

You can hook open weave wool cut wide #6 or #8 easily with the proper tools and backing.

New , natural coloured wool woven just for hooking if purchased in 5 yd. lots is approx.$25 a yd. Keep this in mind when searching for new wool in fabric stores.

100% wool is usually very soft to the touch.

Worsted wool will unravel at cut edges while being hooked.

Wash all garments immediately or freeze or store outside of your home because of moths.

Place mothball odoured or musty smelling wool outside in the sun to remove odours.

The Siren Song

It is calling me and I hope not to the rocks.... I've been looking at a lot of knitting sites this morning but I want to console you with the fact that all activities on the side involve WOOL .... I've many mistresses to serve but they all live in the same house working for the same madam.... EWE. Now that is punny.
As you can see I'm not the only one here who loves wool !!!


As I sat surfing, church members parked their cars and went to the pews.( 3 churches right on my block) What in the world are they doing sitting inside on a day like this ? It is sunny for the first time in 3 weeks. It took me a moment to realize I was inside as well ....... worshipping the wool !

They say a big storm is coming on and I couldn't be more cozy with all my "STUFF". All that potential just waiting to be realized. Yes, so great to think about piles for maybe projects but yet here I sit on the computer. I console myself because blogging feels as creative and productive as anything other thing I do.

Next Sunday I'm starting a year of monthly Sunday classes. In these classes you may learn what you wish. I'm looking forward to seeing who will show up. Every class becomes it's own happening and it's a pleasure to see what interactions play out among the participants.

I'm not sure I told you about the middle of the night transformer failure and resultant excitement in my neighborhood a few weeks ago but yes it was a bit of a trial. It's taken a week or two just to get my sense of ALARM to calm from waking up in the middle of the night to cats hitting the deck and light bulbs popping and acrid smells in the total dark.

Many things got "deaded" by the surge in my house but I faired better than many others. Two things in my studio got toasted, the TV and computer.

I was surprised as I could be by the number of times I went to use the computer on hooking day and IT WASN'T THERE. I had no idea I used it so much.
The good news is a new TV that will let me link up to my LAP TOP .... here come the BIG slideshows in class.
AND my replacement computer will help me easily create podcasts. This is something I've been wanting to do and you will see them soon on this blog or on my website. We aren't sure where we want to post them yet. There are ALWAYS good things coming, no matter what it looks like or feels like at the time.

It seems many of you have taken this holiday opportunity to hook... BRAVO !
I wish I was following in your good path.
I'm still stuck in the reading mode.

I do hereby vow and declare most avidly that I will make something each day during the month of Dec. to be posted here.
Hold my feet to the fire my friends.

Try setting a goal yourself, it helps.

Friday, November 28, 2008

Hook-in update ( partial ) and scrappy orientals

Yesterday was hook-in and though snowing ( as it has every day for two weeks) many came out. I wasn't able to take photos of every one's projects due to a camera battery crash.

Nevertheless here are some of the wonderful projects being worked on. Sandy, who was making a little lamb on a hill side, Lorraine, who is working on her exquisite house portrait, and Erin who is recreating a photo she took of a wonderful close up of a tree are missing. I hope to post these projects next week. These artists are a wonderful inspiration.

Judy's Scrappy Oriental


Shirley's Scrappy


Barb's Robins in a birdbath called Girl Tawk


Jane's Love Poster ( made entirely of nylons with linen backing due to wool allergy)

Wednesday, November 26, 2008

Good sayings

I asked students to post secrets on the wall during our dyeing class in Burlington.
Not too many did it !
But one great lady , Gerry, did so almost every day.
She has been in my class before and some of the things she wrote were things I've said previously.
I had completely forgotten I'd even said them and enjoyed them as FRESH.

Creativity is anything you want.

To take off and fly you have to have resistance.

The road to success is always under construction.

Tuesday, November 25, 2008

What I made today

I met a person who accidently felted her favorite sweater.
She was sad, I told her I would make some thing nice out of it for her. Last winter.
This is the first day I've had I could do it.
I really enjoyed making this.
I hope she finds it useful, it is lined and has an inside pocket.
It is remarkably sturdy.
And very retro, Donna , do you hate this one ?
We have a history of bags....


A Picture is worth a thousand words

Before Heart Knowledge and ACTION ( versus head ) of use of Values
Dearly Beloved


Dearly Beloved Black and White


AFTER Knowledge in Value use kicked in
Town Hooker


Town Hooker in Black and white looses none of it's impact in depth or clarity !

How to read your colour value comfort zone

Every one who uses colour belongs to a certain group.
The Sisters of the Light

The Ladies of Dawn and Dusk aka The Fence Sitters

The Daughters of Darkness

Use a digital camera set to take photos in black and white.
Take photos of your rugs in black and white.
Look at the values that show up.

Use this scale to judge where your rugs sit.


If your rugs are mostly on the top range of the scale you are a Sister of the Light.
If you are mostly using middle range values you are a Dusk and Dawn - Fence sitter.
If you have mostly the lower end of the scale you are a Daughter of Darkness.


Now take another careful look at your black and white rug.
Can you see all your motifs ?
I bet the answer is no. It's that way with most of us.
Because of our friendly, comfortable and supportive value group we don't use the full range of values. This means mean very dark and very light ( used in comparison) in the same rug.
This creates a rug of low contrast, poor definition and low interest for the viewer.
You will notice my demarcations on the diagram only run the range of about 5 values. THIS IS NOT ENOUGH.

Learn who you are, fight your inclinations, make rugs of distinction.

Monday, November 24, 2008

Look - how rich is this ?


Take a good look at this painting.
I want you to look for repeated shapes. One shapes plays an important role here, which is it ? Which is the secondary one?
Look for a repeated colour, orange.
Look everywhere, look carefully.
Look how cleverly orange's counterpoint is used.
What about dark darks ?
How about the light ?

Is that a mirror or a window..... does it matter ?

Look at the lines..... how are they framing ? How are they informing us where to look?

If we were to recreate this would our rug hooking lessons tell us this would be too "busy" to hook ?
Let us make space ( depth ) in our rugs with the skillful tools used here.
Let's not be too hasty to edit and more invested in blending an array of principles and elements of design to create what ever we want, depth , light, interest , emotion, mystery

Why we need dark, really dark

A week or so ago I posted an impromptu project of a copper hydrangea head.
So this wouldn't end up in the pile of great undones I worked here and there on finishing it.
I added two leaves and planned to use a dark background.

The leaves were hooked deliberately flat, meaning I only used one colour of wool for each leaf.
They did not look good.
They sat there sad and plain and almost ugly.
They also didn't do a thing for the florets.

But I hung in there, didn't rip them out.
I added my very dark background the other night.

Suddenly my flower bits looked hideous too.
Did I rip them out ?
OH NO my friend I stopped and looked and thought, this project is not sticking to it's theme of having a dark ground.
Wouldn't that dark be peeking through the little parts of the flower head ?
I hadn't made the dark bits around the petals dark enough.
I replaced some here and there and wow , what a difference it made to the piece.
It magically worked !

Without ripping out more than 10 strips.
It's the dark my friends.... or it might be the light or more importantly it is the careful noticing of colour impact on the whole idea.
You can't play enough with colour.

Here is what it looked like before


And after


Don't worry about that strange dark piece right in the middle of a violet flower, it is a bit of wool on the rug , not in it.

I think I could add a few more dark spots over in the corner.

Friday, November 21, 2008

The Whole Idea

I am in the tail end of 24 hours spent completely alone except for my siamese girls and some serious snowfall.
Very nice.
Brain is connecting one thought to the next to another and yet another. This is something I like.

One thing that has been coming to mind when I have these quiet minutes is the concept of the whole idea.
Last night I noticed how a great many TV shows are showing us this trick.

You might find my taste in Tv a little suspect or downright strange but I love watching American Chopper, LA or Miami Ink, Project Runway. What might those three have in common ?

Well the obvious is they are all making something.
The more subtle and important thing is they are working to a theme.

They have a focus and when decisions need made they go back to the theme.
Project Runway is a bit of a special case, it can be a Whole Idea - how not to do it - example. I can't tell you the number of times contestants completely ignore the weekly directives given by the hosts and then are surprised when they fail !

On the other shows their livelihood depends on their ability to listen to and deliver what the customers wants.
What they accomplish when working to their whole idea is wonderful.

All three shows are creating in areas where you 'd think everything that could be done has been.
Yet the creative talents still bring home the fresh bacon.

Tips hookers can use from TV

Have a theme , let everything in a hooked piece support that theme.
TAKE A CHANCE !
Things go wrong, so what, let it be a catalyst for learning, growth and ultimately CONFIDENCE.
MAKE A PLAN, you don't see Kat VonD just inking up somebody without researching, drawing and giving herself an outline to go by.
Have a goal/ vision for what you are creating and remember that when you choose your fabric and cut.
Adlib within your plan- don't get fixed
If you have a block revert back to what you wanted your creation to be, it will get you back on track
Add your own twist to old methods.
Reorganize your resources, are you sure you are seeing fully what your wool can become ?
Get help- outsource when you need it.
Have a supportive environment
Don't take things personally- that's straight from American chopper - Paul the Elder is NOT good at stress management and the whole shop would be snivelling in the bathroom all day if they paid serious attention to him
Don't get into a bitch fight with your rug , straight from Project Runway
Look at things a new way, straight from LA Ink

Thursday, November 20, 2008

Dip Dyeing - How to

Dip Dyeing
Ingrid Heronimus first demonstrated dip dyeing to me in a class with the Owen Sound Hooking Honey's in 1998.

Dip dyeing allows us to hook continually without changing colours to produce smooth gradations of colour. I will be demonstrating how to do this with uglies and light coloured textures/plaids but any natural,light or medium coloured wool works well.
Read all the instructions before proceeding.

Equipment needed
deep pan at least 5 inches (old deep fryers work very well.)
wire hanger
safety pins
soaked wool - multiply the length of the area to be hooked by 5, if your leaf is 6 inches long your piece of wool needs to be 30" long
3 dye solutions (works with one or two as well)

lots of vinegar or a bit of citric acid
time to complete this task without interruption
rubber gloves..... your choice

After you have prepared your dye solutions heat the pan of water up. Meanwhile use your safety pins to attach your wool to your hanger. Do not place more than two strips on the same set of pins. Have a safety pin at each corner of your wool. You may separate your pins with clothes pins to keep them from sliding over and bunching up your wool resulting in uneven dyeing.

When using three formulas to dip dye I use a light, medium and dark dye.
Pour your light dye solution into the pan. Take hold of your hanger and dip your wool into the water. Immerse the wool slowly while swishing it around. After 3 or 4 minutes add your vinegar or citric acid crystals and lay the wool right into the bath and keep movement going until the dye bath is exhausted( cleared).
Remove wool. Add your medium colour into the dye bath, Immerse wool slowly to the 2/3 point. KEEP DIPPING UP AND DOWN . This will keep you from having a definite line on your wool. Add more vinegar if necessary. If more blending of colours is desirable wait until dye bath is almost exhausted and lay your wool in the bath all the way.
Remove your wool again. Add your darkest colour , this time just dip in the bottom 1/3 of your wool . Keep dipping all the time, as the dye bath exhausts dip more of the wool in the water.
Take a good look at your wool, are you sure the bottom is dark enough ? Usually people don’t make it dark enough to be effective so use a bit of black , navy or purple to darken it up.

If you are using one colour of dye pour all the dye into the dye bath, add in the bottom third..... swish around and dipping past the third mark from time to time, for a few minutes, then add in the next third. Dipping and swishing the two thirds of wool into the pan, slowly begin to add in the last third.
You can throw the whole piece of wool in now. Stir around until all the dye is gone.

Good dip dye has no sharp lines.
It takes time to perfect this.
Don't answer the door or phone. Keep your wool moving!


Rinse well and hang to dry. If you are using thin wool you can place it in the dryer to make it denser.

Tuesday, November 18, 2008

Getting Down to Business

Looking for patterns is one of the things I do. In rugs, in stones, in behaviour, in life .
As observant as I can be with others I some how fail to see what I'm doing very clearly.

I have noticed:
I hook eyes or symbolic eyes in everything I do.
I like my coloured things to be in spectrum order.

I read a lot of fiction when I'm worn out. Then I read non- fiction then I set to work on making projects.
Looking at my list of books just read I think I'm about to embark on the non-fiction part of this late Fall journey.

I feel the making coming on, I think if I lay my head on the rails I can hear the tracks singing.
Just must remember to left up my head.

What patterns can you notice in your work or life?

Write them in !

Here is a little rug I just hooked using my swatches in two articles : Swatch Switch in RHM , just have to hook the leaves.
It is full of eye shapes aka hydrangeas.

Tickling My Fancy

Just lately I noticed a trend in advertising of all these wonderful expressive scrolls and vines growing out of products in advertising. I love them ! So organic and wonderful and faintly Grimmish.
To see an example


This was clip art and I am acting like a complete pirate because I cannot find the reference for it in my notes. I don't know who did it and cannot give them credit, I'm ashamed to say, but I wanted you to see it so I'll being going to cyber hell any day now.

I posted it here in all respect not for use by hookers but to educate us to see what can be done with the skilful use of value and saturation in a piece of work.

If anyone objects to the posting of this picture please let me know.

We are frequently worried about making things too busy.
You can clearly see here busy is balanced by open free non specific space ( no colour, no action).
Look at the depth reached by applying underlying motifs but in duller colours that are also lighter: a weaker version so to speak.
What tickles your fancy these days ?

Confessions of a Hooking Teacher

It is a fine line we tread. On the one hand I want to make a living.
On the other I truly love what I do and want to share the wonder of the hooking experience.
Can both exist ?

I heard today farm workers just won the right to collective bargaining .... that was a surprise to hear such a thing needs legislated in this day and age.
There was a debate how paying more money to the workers would bankrupt the farm owners and no one would pay the price for food if the workers were paid properly. A caller stated , if food prices are cheap, someone is paying somewhere along the line.
I guess it is the farm workers in this case. The farm workers also stated in no way were they after mom and pop family operations but more interested in commercial type farms.


Most of us hooking suppliers and teachers are mom and pop operations.
Mostly just mom.
We moms have a long history of doing for others and not thinking about the value of the rich services we provide.

Imagine the farms with no one to harvest.
Imagine our tables.

Imagine the rugs I could be making if I wasn't teaching.
LOL --- what I really mean is:
Imagine proper pay for solid skills, richly and freely given.
Imagine what we could learn.

Just a note: teen age babysitters make per hour than the average hooking teacher.

Rug Hooking teacher hard at work

Saturday, November 15, 2008

Creation and Expansion Part 2

How is your visual journal going ?
Did you explore the idea of space? What did it mean to you, did this expand as you worked on your page ? That was a little punny, sorry.

The next idea we will look at is comfort.

Work your magic my friends.


Baby Mary cadges some comfort from the dollar bin

Monday, November 3, 2008

More Rugs and Impression in Wood Vendors


A beautiful rug by Barbara Kerr ( no relation)

More Woolgathering fun

Tried to get "front" shots but did not succeed too well.

Here is Elaine Chalmers from The Cozy Nook


Woolgatherers Rugs In Progress and Finished


This picture shows more beginning projects.

Woolgathering Pictures

The first rugs of Woolgatherers


The Woolgathering

It is a true saying that a girl can't do anything well unless she has help.
This especially pertains to me and Woolgathering. I thank every one again for all the help they offer, and of course it is always the same set of wonderful people. Maybe they know I'm in charge of who goes to hooker heaven.

We had a wonderful turnout and so much fun seeing everyone's first rugs. Some took that literally and brought the first rug and some brought smaller pieces typically made when we start. It was also fun to hear who are the "typhoid Marys". Though not too glamorous a designation they really do spread the word of hooking around where ever they go. There were several mentions of the same people, Elaine Allerton, Freda MacDonnell. And then of course the family ties, rug hooking really spreads laterally and vertically through family trees.
One thing we did note is the FADE factor. Several rugs were down to the lightest of pastels. On the flip side they were still vibrant and beautiful.
The sun is not our friend.
Though some dyes are more prone to quick fading, all fabric no matter the dyes will eventually fade.
This is why it is good to use stronger colour than you might want, it is also good to dye over already dyed wool especially when dyeing BLUE.

One thing I like best about Woolgathering is the wealth of diverse projects. Rarely do you see two people working on the same or a similar project.
I took some very bad pictures, on days like that I should be cloned. But I will send them out soon bad or not.

Our next program is more of a contest, Who has the most unfinished rugs ?
There is a prize.... if you think you're a contender head our way April 4.

Measuring wool

I recently had a terrific question, how do I measure wool for dyeing? I have to say accurate measures of wool result in successful dyeing sessions especially if you use formula books.
For the most part teachers and wool sellers use the same methods of measuring and cutting

I noticed this is a hard concept to grasp sometimes in dyeing classes and if I'm teaching my intense 1 day class I have all the wool prepared because this can take an hour to get down pat. When I first started selling wool I kept samples of 1 yd, 1/2yd, 1/4 yd, 1/8th yd and 1/16th yd and 1/32 yd with labels on them so I could refer to them when I needed to be sure.
Now it is old hat.

Measurements of 36" along the selvedge edge then clipped and ripped gets you a yard of wool.

Measuring 18" inches along the selvedge edge is 1/2 yd

Fold the 1/2 yd, matching the selvedges together, clip at the fold and rip gives you two 1/4 yds.

Folding the 1/4 yd in half so it is still 18" long, clipping at the fold gives you two 1/8th yds.

Fold 1/8th in half so and clipping at the the fold gives you two 1/16 yd.

If you fold the 1/16th in half so it is still 18" long , clip and rip you get two 1/32 yd

Here is a diagram to reiterate if you are a more visual person.